Showing posts with label crafts. Show all posts

Monday, August 29, 2011

Cupcake Stand #2

You may remember a few months ago I scored some plates at Target for waaay cheap.  I finally got around to my little project.

I bought some candlesticks at Dollar Tree...


Used some gorilla glue, placed the candle stick in the middle of the plate (on the back, of course) and placed a heavy book on top while it dried.  I left it alone for about 24 hours before starting the next layer.


Here's my final project!


And I decided not to glue the top layer on, just to keep things a little more convertible.  And I figured this way would make it a little easier to store! ;-)


Sorry this pic is icky-blurry!
I spent $8.44 on the plates, $3.00 in the candle holders and we already had the gorilla glue.  So in total I only spent $11.44 on this project.  Pretty good, in my opinion!

And it went perfect with my pink lemonade cupcakes!  If you're interested in my first cupcake stand, you can see it here.


Linking to:


Sunday, December 19, 2010

Lesson 136- Those Wire Hangers Are Actually Useful

You know those wire hangers that are pretty miserable that the dry cleaners always return your clothes on?  I've finally found a great use for them...


...a Christmas wreath.  I used my very strong (and very handsome) Husband to undo the hanger to was just a straight piece of wire.  Then I started putting gold and silver ornaments on the wire.  I needed about 48 regular sized balls and 36 tiny balls to use as fillers.
Before putting the ornaments on the wire, I used hot glue to glue the tops on to the ornaments.  You don't want them falling off when you're opening or closing the door.
Once all my balls were on the wire molded it into a circular shape and had the Husband wrap the wire around itself at the top to close it.  To make it a little more secure I hot glued the sides of the balls to each other.

I used red ribbon to make a hanger at the top.  I recommend stocking up on ornaments at Hobby Lobby when they are 50% off.  This way you're paying for only half the ornaments you need.

Friday, October 22, 2010

Lesson 127- Saving the Tatas

In honor of Breast Cancer Awareness Month, I decided to make this t-shirt with some help from my local Hobby Lobby.

Supplies:
* 3 different types of pink ribbon
* black t-shirt
* white fabric paint
* letter stencil
* 3 buttons
* needle and thread

I first cut the ribbon about 3 inches long.  To prevent the ribbon from fraying, I used a lighter to singe the ends.  I used a dab of hot glue to keep the ribbon in a cursive "l".  After arranging the ribbon letters on the shirt where I wanted them, I used a dab of hot glue to place them on the shirt.  Then I sewed the buttons on the part of the "l" where the ribbon crosses.

Now it was time to paint the rest of the words on the t-shirt.  I bought a screen letter kit.  I was kinda tricky.  I'd recommend practicing on some scrap fabric first.  Too bad I didn't give myself that advise till after I did it.  Oh well.


And oddly, the pics I took seem to have disappeared, so I'm only able to show you the finished product.  Sorry! 

Do you have a special shirt bringing awareness to breast cancer?  Have you seen the NFL players with their hot pink shoes and such?  I think it's awesome that it's so popular and hopefully a cure is just around the corner!

Thursday, October 21, 2010

Lesson 126- Making Napkin Rings

Here is one of the Halloween projects I did last year.  

A combination of wanting some Halloween decorations and not having a lot of money to spend on them I decided on making my own Halloween napkin rings.

Supplies:
*cardstock
*scissors/paper cutter
*ruler
*hot glue gun with extra glue sticks
*ribbon in 3 different colors (I used purple, spider web print, and green)

Directions:
1. Cut card stock into 2inch strips
2. With a hot glue gun, glue strips into rings about 2 inches in diameter
3. With first ribbon color, glue one end of ribbon on inside of napkin ring
4. Wrap in and out ring vertically with ribbon, gluing as you go.
5. Glue other end of ribbon on the inside of ring, once outside surface is completely covered.
6. With second ribbon color, wrap once around outside of ring (horizontally), gluing both ends.
7. Repeat step 6 with third ribbon color.

Sorry I don't have pictures of the process or better instructions--this post was kind of an after thought! But here's the final product. Hope you enjoy!

Wednesday, October 13, 2010

Lesson 120- Pumpkin in a Jar

I've seen these all over the blogosphere and wanted some for my own.  I used the mason jars I bought thrifting a while back, tissue paper left over from a gift bag, scrapbook paper, and acrylic paint.  Oh, and don't forget the Mod Podge.

 I cut the tissue paper in to strips about an inch thick and glued them to the inside of the jar with Mod Podge.  This wasn't easy!  Don't use mason jars!  Your hands may get stuck inside the jar.  And yes, I'm speaking from experience!

 Then I painted the rim of the jar with green acrylic paint.
Don't worry!  The white Mod Podge will dry clear.

Then I cut out faces from black cardstock.  I looked up Jack-o-Lantern faces from the internet for inspiration.


They're cute, but I think I'll stick to ol' fashioned punkin carvin!!!

Monday, October 11, 2010

Lesson 118- Planting Candy

Last year Husband and I had way more Trick-or-Treaters than we anticipated.  This year we are prepared!  We bought a big ol' bag of candy from Costco (and are doing our best to not eat it all before Halloween.)  Perhaps we should have waited a few more weeks to buy the candy.  But anyway, I digress.

Here is what we're hold the candy in for distribution to cute/scary/funny kiddos.


So very festive, right?!  No worries my friends!  I didn't leave it this week.

I first spray painted the planter with $0.98 black spray paint from Wally World.  
Once it was dried (and wiped off, and then dried again) I added some Halloween stickers found in the scrapbooking section of Hobby Lobby.  The stickers needed some extra love to stick, so I reinforced them spray adhesive.

Once the stickers were sufficiently stuck, I went over the entire thing with a couple of coats of Mod Podge.  Finally, I sprayed the entire thing with an acrylic sealer.  Now it was ready to be loaded with candy. 
Yummy!!!!
Anyone wanna share what their favorite candies are?  Any else like me and are not a choc-o-holic?


Get Your Craft On
 http://linda-coastalcharm.blogspot.com/

Wednesday, October 6, 2010

Lesson 115- Mod Podge Pumpkins

I found these ceramic pumpkins at Hobby Lobby and decided to turn them into my version of designer pumpkins.  I know decorating pumpkins with scrapbook paper and Mod Podge is nothing new, but I love the way mine turned out.

 
 I picked out five different patterns in black and white, tore them in pieces, and used Mod Podge to put them on the pumpkins.  I liked that they didn't look like your stereotypical pumpkins.  But I was worried that they might not look too great with our other fall or Halloween decorations.  So...


I bought a metallic copper acrylic paint and put a very thin layer of paint over the pumpkins.  To keep the ridges defined, I painted a thicker line in the crevice.  And those are my pumpkins.


Show and Tell Green
Make it Yours @ My Backyard Eden


SYS ThursUndertheTableandDreaming


Monday, October 4, 2010

Lesson 113- Halloween Wreath

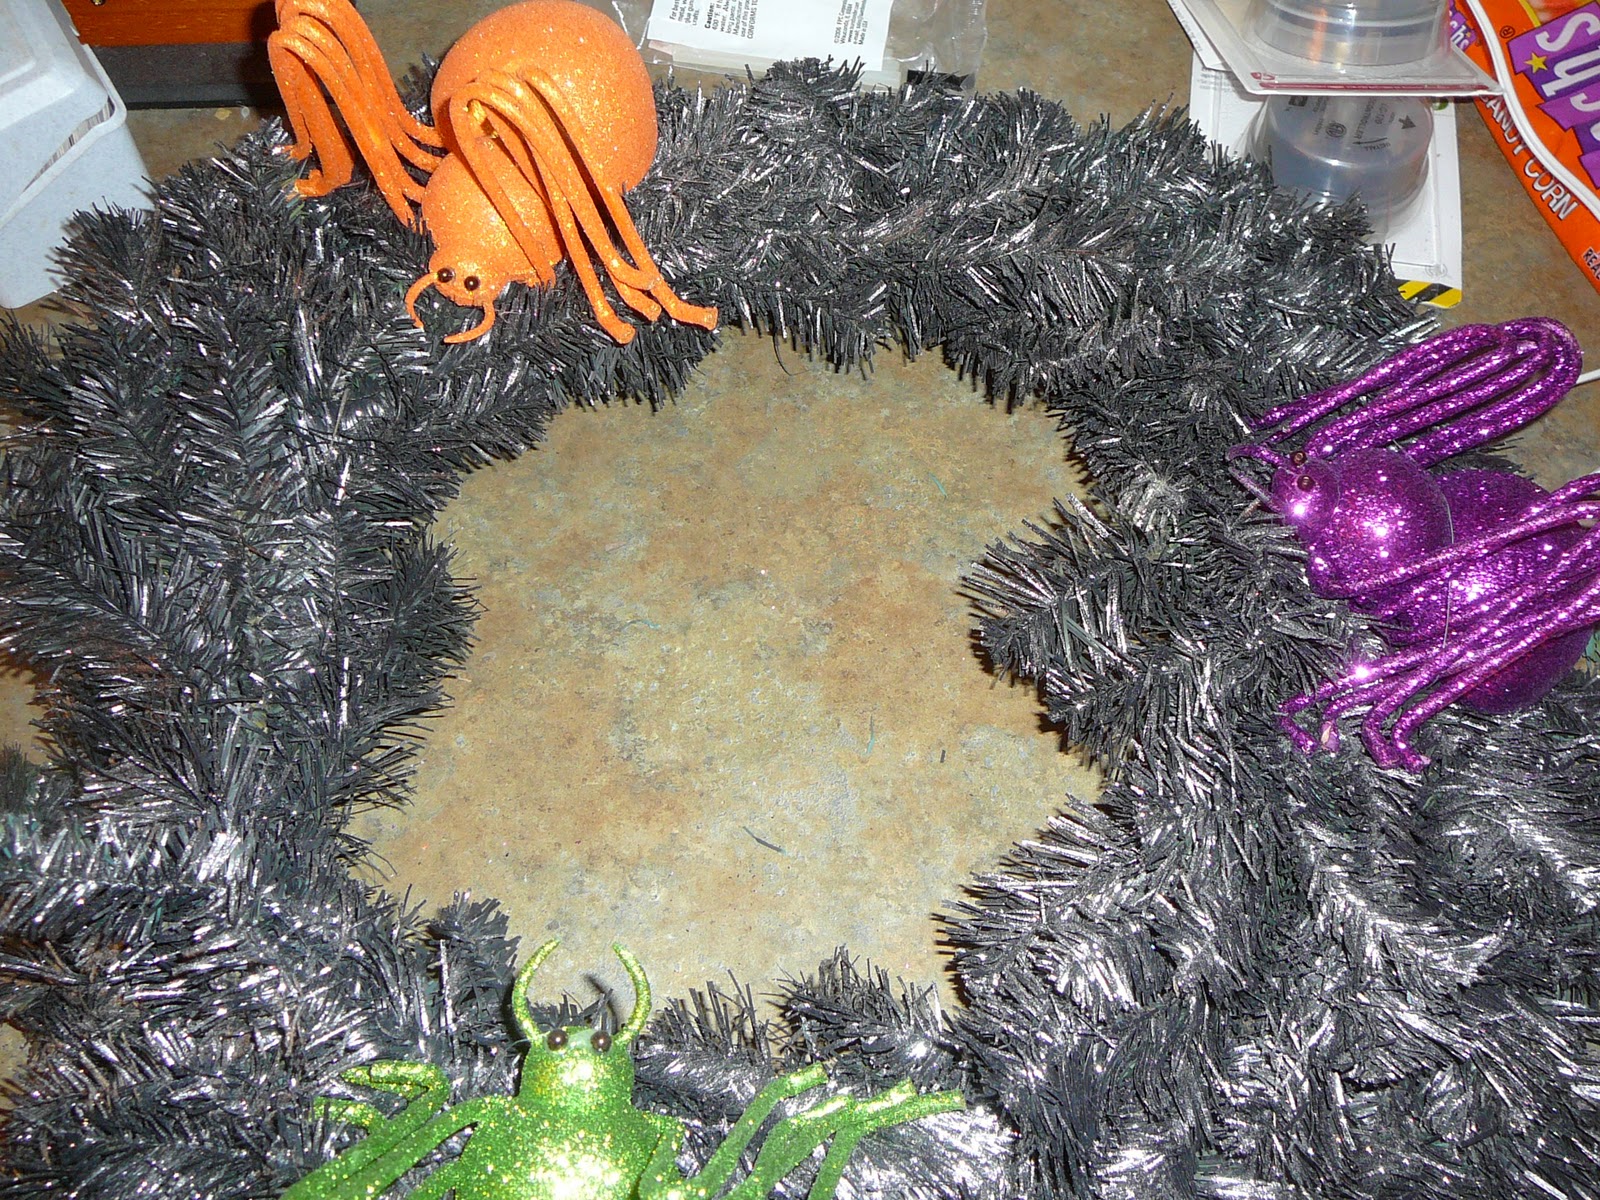
I made a wreath last year for Halloween and it was kinda cool, but it kept falling apart.  That wasn't cool.  But I liked the basic principle of the wreath.  So I made a new one for this year, that is more durable and will last longer than one Halloween.

Supplies
* Christmas wreath ($7.99 at Hobby Lobby, plus 50% off)
* black spray paint ($0.98 at WalMart)
* silver litter spray paint ($4.99 at Hobby Lobby, plus 40% off coupon)
* glitter spiders (Dollar Spot @ Target)
* glitter phrase (Dollar Spot @ Target)
* jewelry wire (already had)
* hot glue gun + glue sticks (already had)

1.  Spray paint wreath black.  It takes about 2 cans to get all the green covered in all areas.


2.  Once the black has dried, spray it with the silver glitter paint.  Both these steps should be completed in a well ventilated area!


3.  Once the glitter is dried, attach your spiders to the wreath.  I first used hot glue to stick them on there, then used the jewelry wire to wrap them to the wreath for added strenght.  This one isn't falling apart this year.


4.  Then I took my glitter word and attached it in the middle of the wreath, again using the jewelry wire to secure it.


I think it's a glittery beauty.


The Girl Creative


Photobucket


Making


Keeping It Simple
Related Posts with Thumbnails