
The boys in the last segment are just too awesome!
Showing posts with label Halloween. Show all posts
Showing posts with label Halloween. Show all posts
Friday, November 4, 2011

Thursday, October 21, 2010
Lesson 126- Making Napkin Rings
Here is one of the Halloween projects I did last year.
A combination of wanting some Halloween decorations and not having a lot of money to spend on them I decided on making my own Halloween napkin rings.
Supplies:
*cardstock
*scissors/paper cutter
*ruler
*hot glue gun with extra glue sticks
*ribbon in 3 different colors (I used purple, spider web print, and green)
Directions:
1. Cut card stock into 2inch strips
2. With a hot glue gun, glue strips into rings about 2 inches in diameter
3. With first ribbon color, glue one end of ribbon on inside of napkin ring
4. Wrap in and out ring vertically with ribbon, gluing as you go.
5. Glue other end of ribbon on the inside of ring, once outside surface is completely covered.
6. With second ribbon color, wrap once around outside of ring (horizontally), gluing both ends.
7. Repeat step 6 with third ribbon color.
Sorry I don't have pictures of the process or better instructions--this post was kind of an after thought! But here's the final product. Hope you enjoy!

A combination of wanting some Halloween decorations and not having a lot of money to spend on them I decided on making my own Halloween napkin rings.
Supplies:
*cardstock
*scissors/paper cutter
*ruler
*hot glue gun with extra glue sticks
*ribbon in 3 different colors (I used purple, spider web print, and green)
Directions:
1. Cut card stock into 2inch strips
2. With a hot glue gun, glue strips into rings about 2 inches in diameter
3. With first ribbon color, glue one end of ribbon on inside of napkin ring
4. Wrap in and out ring vertically with ribbon, gluing as you go.
5. Glue other end of ribbon on the inside of ring, once outside surface is completely covered.
6. With second ribbon color, wrap once around outside of ring (horizontally), gluing both ends.
7. Repeat step 6 with third ribbon color.
Sorry I don't have pictures of the process or better instructions--this post was kind of an after thought! But here's the final product. Hope you enjoy!

Wednesday, October 20, 2010
Lesson 125- Halloweens of Days Before
This was our first Halloween together

My mom always says that Husband looks like Garth Brooks in this picture. But that wasn't intentional. Anyone wanna guess our costumes?
Last year, we didn't dress up. But we did dress Montana up.

We thought it would be funny to dress her up as a lobster since we had just returned from our New England/ Canada cruise.
I'm going thrifting this week in search of some necessities for our costumes this year. And I'm very excited for our costumes this year.
Are you dressing up? What was your favorite Halloween costume? Or do you prefer dressing up your pets instead?
Monday, October 18, 2010
Lesson 123- My First Cake Revisited
This was the first cake I ever made (by myself). And in the spirit of Halloween I thought I should share it again.


And here's the original post if you're interested.
Happy Monday!
Wednesday, October 13, 2010
Lesson 120- Pumpkin in a Jar
I've seen these all over the blogosphere and wanted some for my own. I used the mason jars I bought thrifting a while back, tissue paper left over from a gift bag, scrapbook paper, and acrylic paint. Oh, and don't forget the Mod Podge.


I cut the tissue paper in to strips about an inch thick and glued them to the inside of the jar with Mod Podge. This wasn't easy! Don't use mason jars! Your hands may get stuck inside the jar. And yes, I'm speaking from experience!

Then I painted the rim of the jar with green acrylic paint.

Don't worry! The white Mod Podge will dry clear.
Then I cut out faces from black cardstock. I looked up Jack-o-Lantern faces from the internet for inspiration.

They're cute, but I think I'll stick to ol' fashioned punkin carvin!!!
Tuesday, October 12, 2010
Lesson 119- Pottery Barn from the Dollar Store
I know this isn't the most original idea, but I love the way mine turned out. I may make 23 more. Or maybe not, maybe just 17.
Remember I bought these two candlesticks from Goodwill a while back?
 I wasn't entirely sure what I was going to use them for, but I was certain that it wasn't going to be candlesticks. Then I discovered a random vase in the back of my car. I have no clue what it was doing there, perhaps cleaning my car should be a post. Someday... gosh I'm rambling today.
Anyways...I decided to turn the vase and the candle sticks into some hurricane vases. I bought a third candlestick and two more vases in different shapes and sizes at the dollar store.

I put a thin layer of Gorilla glue on the top of the candlestick, flipped the vase upside down, and carefully placed the candlestick holder in the center of the base of the vase. Next, I put a super heavy book on top, being very careful to balance it without letting the candlestick holder slide around. Kinda tricky. I kept the book there for about 12-ish hours.
Then I filled them up with some Halloween decorations. The largest was filled with a bag of candy corn. But don't eat them! I first sprayed them with acrylic sealer. This way they don't get sticky, don't attract bugs and I can keep them for a couple of years for decorating. I like decorating with them, but think they're too gross to eat. In the medium one I put some Spanish moss, that I had from this project, and some plastic skulls from the Dollar Store. In the little one I put some silver glitter spiders I found at the Dollar Store too.


Remember I bought these two candlesticks from Goodwill a while back?

Anyways...I decided to turn the vase and the candle sticks into some hurricane vases. I bought a third candlestick and two more vases in different shapes and sizes at the dollar store.

I put a thin layer of Gorilla glue on the top of the candlestick, flipped the vase upside down, and carefully placed the candlestick holder in the center of the base of the vase. Next, I put a super heavy book on top, being very careful to balance it without letting the candlestick holder slide around. Kinda tricky. I kept the book there for about 12-ish hours.
Then I filled them up with some Halloween decorations. The largest was filled with a bag of candy corn. But don't eat them! I first sprayed them with acrylic sealer. This way they don't get sticky, don't attract bugs and I can keep them for a couple of years for decorating. I like decorating with them, but think they're too gross to eat. In the medium one I put some Spanish moss, that I had from this project, and some plastic skulls from the Dollar Store. In the little one I put some silver glitter spiders I found at the Dollar Store too.


Thank you Potter Barn for being so inspirational! And thank you Dollar Store for being so affordable!
Monday, October 11, 2010
Lesson 118- Planting Candy
Last year Husband and I had way more Trick-or-Treaters than we anticipated. This year we are prepared! We bought a big ol' bag of candy from Costco (and are doing our best to not eat it all before Halloween.) Perhaps we should have waited a few more weeks to buy the candy. But anyway, I digress.
Here is what we're hold the candy in for distribution to cute/scary/funny kiddos.

So very festive, right?! No worries my friends! I didn't leave it this week.
I first spray painted the planter with $0.98 black spray paint from Wally World.

Once it was dried (and wiped off, and then dried again) I added some Halloween stickers found in the scrapbooking section of Hobby Lobby. The stickers needed some extra love to stick, so I reinforced them spray adhesive.
Once the stickers were sufficiently stuck, I went over the entire thing with a couple of coats of Mod Podge. Finally, I sprayed the entire thing with an acrylic sealer. Now it was ready to be loaded with candy.

Yummy!!!!
Anyone wanna share what their favorite candies are? Any else like me and are not a choc-o-holic?

Get Your Craft On

 |
Get Your Craft On
Tuesday, October 5, 2010
Lesson 114- A Spidey Table
I had so much fun decorating for Halloween the other day after work. And the tablescape I came up with I think is my favorite so far.




Monday, October 4, 2010
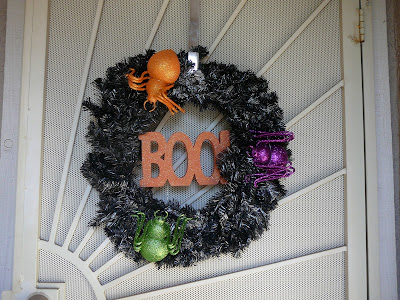
Lesson 113- Halloween Wreath
I made a wreath last year for Halloween and it was kinda cool, but it kept falling apart. That wasn't cool. But I liked the basic principle of the wreath. So I made a new one for this year, that is more durable and will last longer than one Halloween.
Supplies
* Christmas wreath ($7.99 at Hobby Lobby, plus 50% off)
* black spray paint ($0.98 at WalMart)
* silver litter spray paint ($4.99 at Hobby Lobby, plus 40% off coupon)
* glitter spiders (Dollar Spot @ Target)
* glitter phrase (Dollar Spot @ Target)
* jewelry wire (already had)
* hot glue gun + glue sticks (already had)
1. Spray paint wreath black. It takes about 2 cans to get all the green covered in all areas.

2. Once the black has dried, spray it with the silver glitter paint. Both these steps should be completed in a well ventilated area!

3. Once the glitter is dried, attach your spiders to the wreath. I first used hot glue to stick them on there, then used the jewelry wire to wrap them to the wreath for added strenght. This one isn't falling apart this year.

4. Then I took my glitter word and attached it in the middle of the wreath, again using the jewelry wire to secure it.
Supplies
* Christmas wreath ($7.99 at Hobby Lobby, plus 50% off)
* black spray paint ($0.98 at WalMart)
* silver litter spray paint ($4.99 at Hobby Lobby, plus 40% off coupon)
* glitter spiders (Dollar Spot @ Target)
* glitter phrase (Dollar Spot @ Target)
* jewelry wire (already had)
* hot glue gun + glue sticks (already had)
1. Spray paint wreath black. It takes about 2 cans to get all the green covered in all areas.

2. Once the black has dried, spray it with the silver glitter paint. Both these steps should be completed in a well ventilated area!

3. Once the glitter is dried, attach your spiders to the wreath. I first used hot glue to stick them on there, then used the jewelry wire to wrap them to the wreath for added strenght. This one isn't falling apart this year.
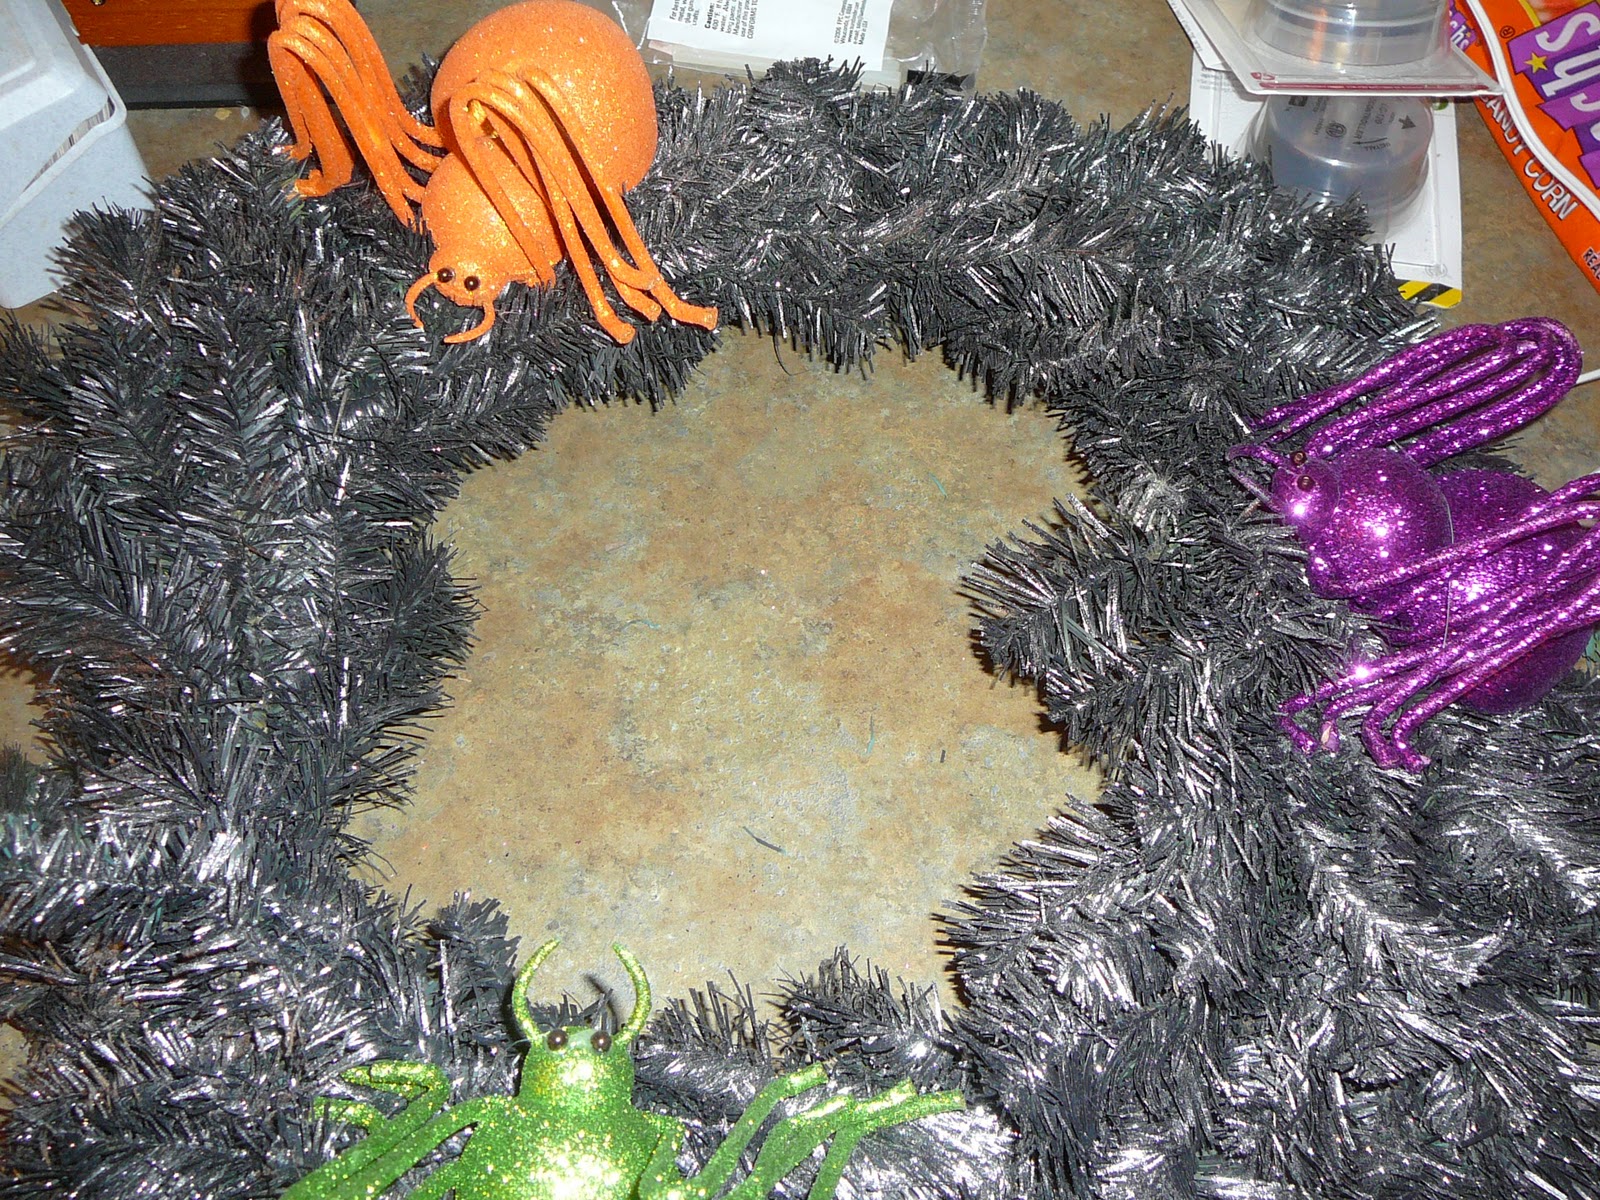
4. Then I took my glitter word and attached it in the middle of the wreath, again using the jewelry wire to secure it.









Sunday, November 1, 2009
Lesson 3-Spider Cake
Sorry this is a little late but maybe you can use it next year...
Last night we had Brady's parents and some friends over for a game night, nothing too Halloween-y, but still as fun. We dressed our dog Montana up as a lobster, fitting since our honeymoon was spent in New England/Canada just a few weeks ago.

Anyways...onto the cake. Again, I was really bad a taking pics (working on it, I promise!)
Supplies:
* 2 boxes Halloween funfetti cake mix
*6 eggs
*2/3 cup oil
*2 cups water
*1 can orange frosting
*1 can chocolate frosting
*1 tube white decorating icing
*1 toothpick
*2 9inch cake pans
*spider rings for extra decoration
Directions:
Follow directions for the cake on the box. To make it a little healthier you can replace the oil with applesauce (again 2/3 cup). Fill cake pans half full. Bake cakes for approx. 30 min on 350 degrees. Once cakes are finished, pop out of pans, and place on cooling racks to cool completely.
I waited about an hour and a half to make sure they were completely cool (makes 'em easier to frost). Place first layer on a plate and cover with orange frosting. You just need a good layer so the two pieces stick together. Then carefully place the second cake on top.
Next, frost the entire cake with chocolate frosting.
 Using the tube of cookie decorating icing, start in the center of the cake a make a spiral working outwards to the edges of the cake.
 Then with toothpick (again starting at center of the cake) begin pulling icing outwards to make the web. Repeat all the way around the cake.
  Lastly, place spider rings where ever you would like and enjoy!
Subscribe to:
Posts (Atom)


