Showing posts with label wreaths. Show all posts

Friday, July 22, 2011

An Unexpected Ballard Designs Knock-Off

I promise I'm not trying to beat a dead horse, but I just had to share this.  As I was browsing Ballard Designs the other night, I came across this.


For $139.00!!!!  What the ridiculousness!

Source


Here is my version I made last summer.

Original Post Here

For $10.14!!!!  (Give or take some pennies)

wreath- $3.50
twine- already had two; $1.65 for third roll
bag of sea shells- $4.99


Isn't it so great when you can create something for a mere fraction of retail price?!  I love it!!!


Linking to:
The Shabby Nest

Friday, July 1, 2011

Red White and Blue (and a new friend)

It's finally finished. 

I have a confession to make.  I started this last year.  Eek!  I know, I'm a slacker.  This is what it looked like from approximately 11.75 months.


Then, this week I buckled down and finished it.  I made similar shortly after Husband and I got married, but I certainly don't remember it taking so long.

 
  And I mean minus it sitting in the craft room for 11.75 months.  I spent a good 3 or 4 hours this week finishing it.  Maybe that's why it sat untouched for the better part of a year.  And as I write this I'm becoming more and more happy that it's finally finished. 

As I closing in on a finished product, I ran out of fabric.  


I could have gone to buy more handkerchiefs, but then I would have leftovers that I didn't really want.  


So I improvised...with Christmas ribbon.  It was red.  It matched.  I was on board.

Here it is on our front door.


And here is the friend I found outside while I was hanging the wreath.  I think he's cute.


Happy Fourth of July Weekend!!!


Linking to: 

The Shabby Nest


Chic on a Shoestring Decorating


Tuesday, December 21, 2010

Lesson 140- Another For the Collection

I originally made this wreath a couple of years ago (in my pre-marriage, pre-blogging days) so I don't have a picture of the process or what it used to look like.  But it's a simple concept.  Take a plan wreath and hot glue ornaments, evenly spaced.  It was nice looking, but too simple.  So this year, I took some red ribbon (the same I used for this wreath) and wrapped it around the wreath in the spaces between each ball.  Now I think it looks so much better.

Sunday, December 19, 2010

Lesson 136- Those Wire Hangers Are Actually Useful

You know those wire hangers that are pretty miserable that the dry cleaners always return your clothes on?  I've finally found a great use for them...


...a Christmas wreath.  I used my very strong (and very handsome) Husband to undo the hanger to was just a straight piece of wire.  Then I started putting gold and silver ornaments on the wire.  I needed about 48 regular sized balls and 36 tiny balls to use as fillers.
Before putting the ornaments on the wire, I used hot glue to glue the tops on to the ornaments.  You don't want them falling off when you're opening or closing the door.
Once all my balls were on the wire molded it into a circular shape and had the Husband wrap the wire around itself at the top to close it.  To make it a little more secure I hot glued the sides of the balls to each other.

I used red ribbon to make a hanger at the top.  I recommend stocking up on ornaments at Hobby Lobby when they are 50% off.  This way you're paying for only half the ornaments you need.

Monday, October 4, 2010

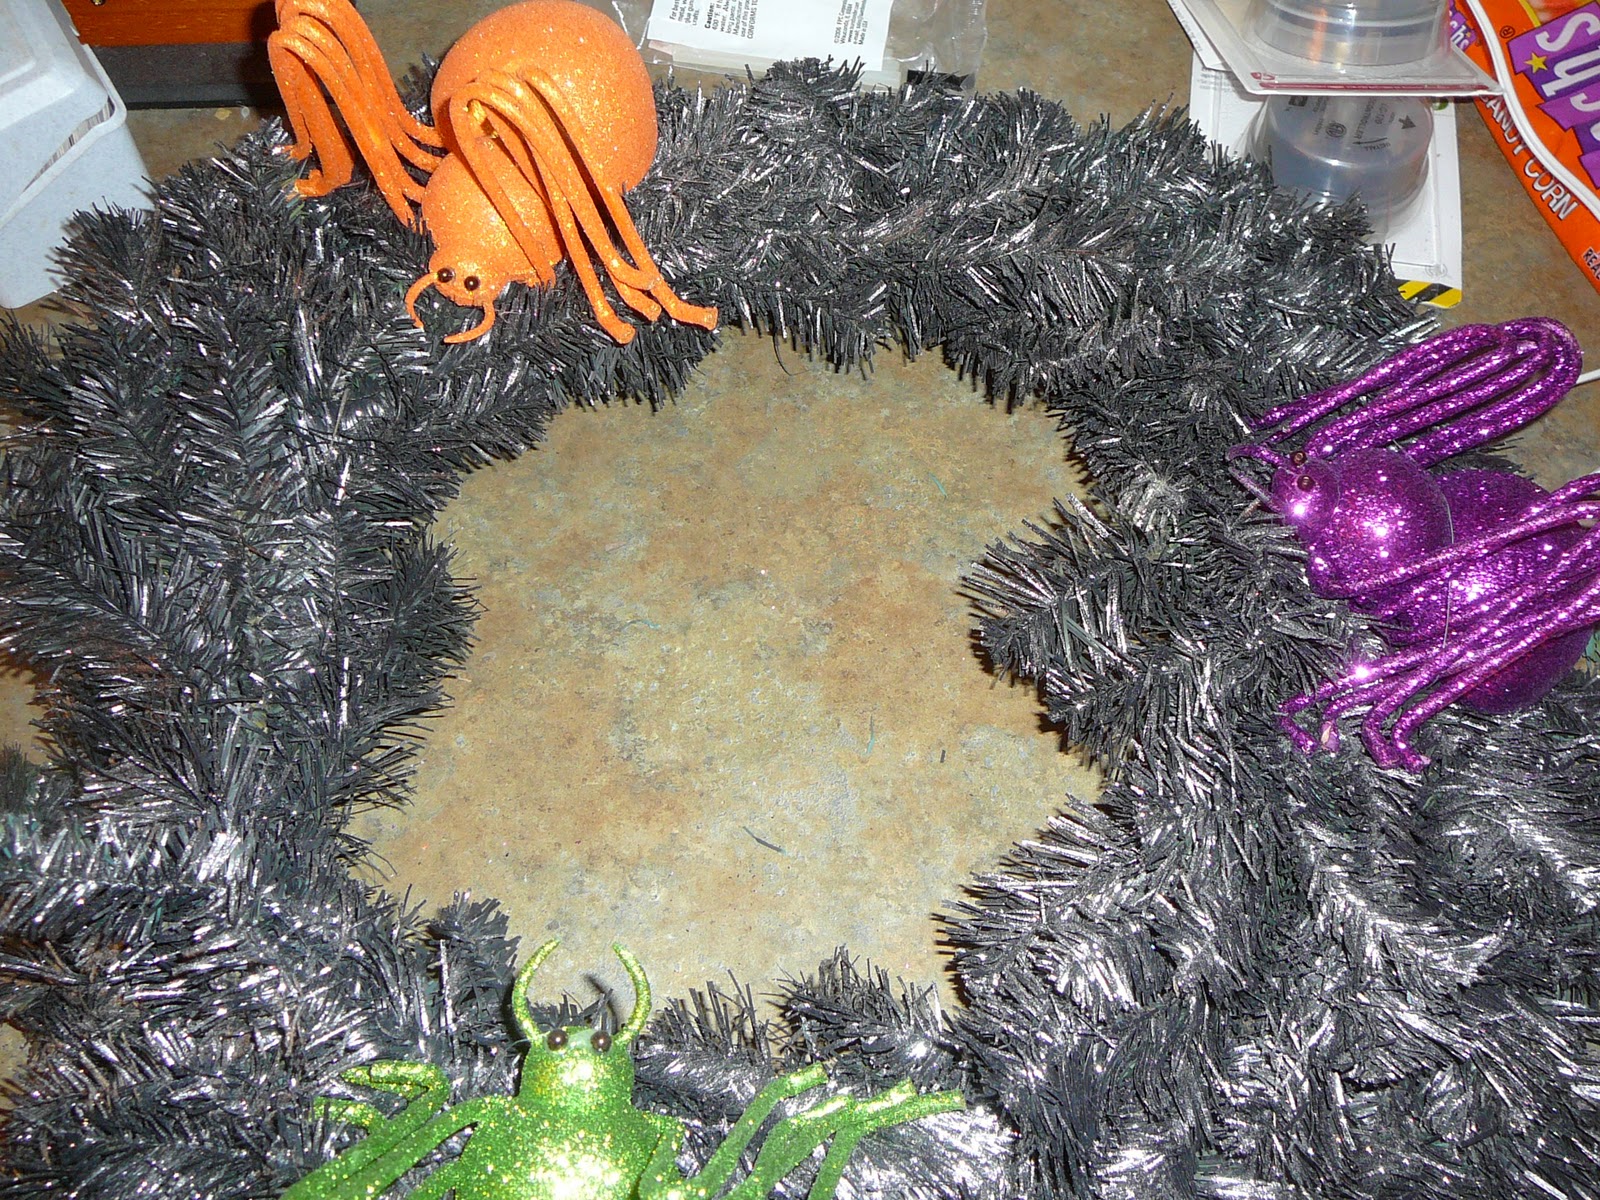
Lesson 113- Halloween Wreath

I made a wreath last year for Halloween and it was kinda cool, but it kept falling apart.  That wasn't cool.  But I liked the basic principle of the wreath.  So I made a new one for this year, that is more durable and will last longer than one Halloween.

Supplies
* Christmas wreath ($7.99 at Hobby Lobby, plus 50% off)
* black spray paint ($0.98 at WalMart)
* silver litter spray paint ($4.99 at Hobby Lobby, plus 40% off coupon)
* glitter spiders (Dollar Spot @ Target)
* glitter phrase (Dollar Spot @ Target)
* jewelry wire (already had)
* hot glue gun + glue sticks (already had)

1.  Spray paint wreath black.  It takes about 2 cans to get all the green covered in all areas.


2.  Once the black has dried, spray it with the silver glitter paint.  Both these steps should be completed in a well ventilated area!


3.  Once the glitter is dried, attach your spiders to the wreath.  I first used hot glue to stick them on there, then used the jewelry wire to wrap them to the wreath for added strenght.  This one isn't falling apart this year.


4.  Then I took my glitter word and attached it in the middle of the wreath, again using the jewelry wire to secure it.


I think it's a glittery beauty.


The Girl Creative


Photobucket


Making


Keeping It Simple

Tuesday, September 7, 2010

Lesson 97-His Wreath

I decided that since football is so important to the hubs, that he could have some of his own football themed decorations.  With the beginning of the 2010 season this week its time to share the wreath I created for Husband.

Supplies
  • 2 rolls of green ribbon (1.5 in wide)
  • 1 roll white ribbon (1/2 in wide)
  • Styrofoam wreath
  • 2 packages of football buttons
  • football Christmas ornaments (you know you've seen 'em in stores since July!)
  • hot glue gun w/ extra glue
  • kitchen knife
  • scissors
  • Scotch tape
  • Gorilla glue


Step 1:  Wrap green ribbon around entire wreath.  I just used scotch tape to keep the ends in place.


Step 2:  I wrapped pieces of the white ribbon around the wreath.  I visually broke the wreath into 16ths (apparently geometry actually did do me some good).  These are the yard lines.  Used hot glue this time to keep the ends in place.


Step 3:  I arranged the buttons where I wanted on the wreath.  I then placed straight pins there to mark the spot.  With the kitchen knife I stabbed a hole through the ribbon into the wreath form.  I took a button, put Gorilla glue on the back and stuck it on the wreath.  I had to hold it firm for a while while the glue set.

Step 4:  Now it was time to attach the ornaments.  One was a cooler with a helmet laying next to it.  I decided that one dangle in the middle.  It is held in place with just a straight pin.  So far that's working fairly nicely.

I then added some ribbon at the top for hanging purposes.  The only football ribbon I found was too thin, so I just glued it to some thicker ribbon and then glued both to the back of the wreath.  Here it is hanging on our door.  


I think Husband was excited to finally get to hang it.  At least I hope he was!  But I wasn't going to make it team specific.  I don't want to make him feel bad because my team is superior to his ;-)

Monday, August 23, 2010

Lesson 86- This Craft Brought to You By...

...The Letter 'M'

Remember I shared my summer wreath with you a few weeks ago?

Well, I decided I didn't like it that much after all.  Apparently Husband agreed (but he said it in the nicest way possible).  It needed something else.  But what?  I had no clue.

I brought out my glue gun, scissors, the left over seashells, the left over twine, and left over ribbon from this project.  I tried wrapping the ribbon in between in the sea shells.  Nope.  That wasn't the 'something' the wreath needed.  What if I randomly zig-zag the ribbon in the middle?  I like random.  I held the zig-zags in place with straight pins...just in case I didn't like the results nothing was permanent.

Ok the random ribbon in the middle didn't look so bad.  What else can I add?  Enter the letter 'm'.  (Does this remind anyone else of Sesame Street?  Such a classic!)


It was left over from a failed wedding project.  Clearly it didn't match the theme of the wreath, so I wrapped twine around it to make it feel a little more included.


Then I hung that from the middle of the wreath with the random ribbon as a background.


Lastly I used the last bit of green ribbon to make a loop to hang the wreath from.  Oh wait.  I still seashells left over.  So I glued the rest on, wherever they would fit.  And voila!  We now had this:


And it looks so much better!  Even better, it cost me no more dollars!  I was fairly pleased, considering I had no plan of action and just pulled it our of my...er...back pocket!


Linking to:
The Girl Creative


Photobucket


Makinghttp://sumossweetstuff.blogspot.com/" target="_blank">Sumo's Sweet Stuffhttp://i58.photobucket.com/albums/g241/summerandrus/Blog%20Graphics/linkcopy.png"/>


Related Posts with Thumbnails