The boys in the last segment are just too awesome!
Friday, November 4, 2011
Tuesday, August 30, 2011
A Slice of Heaven
I wanted to share another recipe I've discovered on Pinterest (originally from here). These are one of the best desserts I've had in a really long time and they are so super easy to make.
Cake Batter Blondies
Ingredients:
* 1 box white cake mix
* 1/4 cup canola oil
* 1 egg
* 1/2 cup milk
* 1/2 cup white chocolate chips
* 1/4 cup sprinkles (I used more, just for fun!)
1. Combine cake mix, oil and egg in mixing bowl. Slowly add in milk to keep the texture thick.
2. Gently stir in chocolate chips and sprinkles.
3. Pour mixture into a lightly greased 8x8 baking dish
4. Bake at 350* for 30-40 minutes. They will still be slightly gooey in the center and I was fairly certain that they weren't finished, but they were. And they were absolutely delish!!!!
Monday, August 29, 2011
Cupcake Stand #2
You may remember a few months ago I scored some plates at Target for waaay cheap. I finally got around to my little project.
I bought some candlesticks at Dollar Tree...
Used some gorilla glue, placed the candle stick in the middle of the plate (on the back, of course) and placed a heavy book on top while it dried. I left it alone for about 24 hours before starting the next layer.
And I decided not to glue the top layer on, just to keep things a little more convertible. And I figured this way would make it a little easier to store! ;-)
I spent $8.44 on the plates, $3.00 in the candle holders and we already had the gorilla glue. So in total I only spent $11.44 on this project. Pretty good, in my opinion!
And it went perfect with my pink lemonade cupcakes! If you're interested in my first cupcake stand, you can see it here.
Linking to:

I bought some candlesticks at Dollar Tree...
Used some gorilla glue, placed the candle stick in the middle of the plate (on the back, of course) and placed a heavy book on top while it dried. I left it alone for about 24 hours before starting the next layer.
Here's my final project!
And I decided not to glue the top layer on, just to keep things a little more convertible. And I figured this way would make it a little easier to store! ;-)
 | |
| Sorry this pic is icky-blurry! |
And it went perfect with my pink lemonade cupcakes! If you're interested in my first cupcake stand, you can see it here.
Linking to:

Thursday, August 25, 2011
A New Doorway
I have loved the idea of chalkboard paint since I was a kid. But since most homes in the Southwest have textured walls it never seemed like such a great idea. Plus the color option weren't so great. Well fast forward 15 years: still living in a house with textured walls, but the color options have improved greatly (thanks to Rust-oleum) and we have a door that needed some love and had a smooth surface.
After some convincing, Husband was on board to paint our door that leaves to the garage with chalkboard paint. And since our Montana likes to scratch at the door when we come through the garage, the door was needing some TLC anyway.
After some convincing, Husband was on board to paint our door that leaves to the garage with chalkboard paint. And since our Montana likes to scratch at the door when we come through the garage, the door was needing some TLC anyway.
We decided on Rust-oleum in Latte from Home Depot. I taped around the deadbolt lock and door handle with masking tape, wiped the door down with a little dish soap and warm water.
The directions recommended rolling the paint on with a foam roller, and I used a short-handled angled paint brush to cut-in.
The door required three thin coats, letting it dry for four hours in between each one.
This was our doggy-proofing device: baby gate plus a chair. The directions said to let the paint cure for 72 hours...which we did. At that point you take a piece of chalk and rub it over the entire surface of the door and then erase it. Now the surface is ready to be a fully functioning chalkboard.
Now I put our schedule for the week on the door (cause Husband has a tendency to forget things). It took a few tries to figure out the best chalk to use. I wanted colored chalk initially, thinking it would show up best on the door. Blue, purple, green and red all looked horrible. You could only see it if you were right up on the door. So far yellow, orange and white show up the best. I'm completely perplexed by the idea, but whatever.
Oh, I almost forgot to tell you about the added bonus to our little painting project! Montana no longer scratches at the door when we are in the garage! I guess humans aren't the only ones who don't like the sound of nails on a chalkboard! Haha! Bonus!
Wednesday, August 24, 2011
Another Seaside Dinner
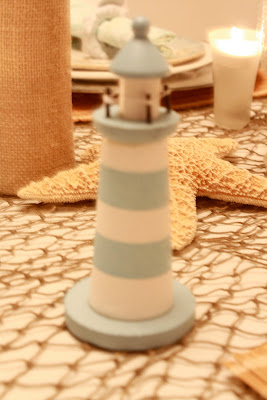
My friends, it's hot! I left work today and it was 115*. I would love, love, love to have some cooler weather. To decorate for fall before Thanksgiving. But that just doesn't make sense. Anyways, this tablescape cooled me off just looking at it. Well, refrigerated air might have helped too.
Tablecloth: Home Goods ($12ish)
Runner: Hobby Lobby fish net
Bamboo Placemats: thrifting
Hurricane: wedding gift
White sand: left over from wedding (from Hobby Lobby originally)
Lighthouses: Dollar Tree
Candles: made by me
Shot glasses: bought on our two Princess Cruises
Star fish: Hobby Lobby
Silver chargers: Goodwill
White plates: my grandmother's
Sea shell plates: Kohl's (my momma bought 'em for me when she came to visit)
Glasses: IKEA ($0.59 each!!)
Napkins: thrifting
Napkin rings: Marshall's
Linking to:
Tablescape Thursdays
Sunday, August 21, 2011
Our New Toy
Our vacuum was very very old. My grandma bought it probably 12 years ago. It finally kicked the bucket last week. We knew it was fairly sick and had already talked about what its replacement would be. So we grabbed one of those handy-dandy Bed Bath & Beyond coupons and headed to the store.
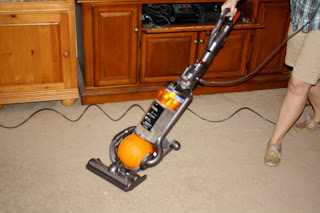
I spent a few moments chatting with one of the sales associates about the features of the different vacuums they had. With her recommendations we went with the same vacuum that we had initially wanted. And I'm glad she didn't try to up-sell us. This is what we came home with:
We got it home, snapped it together and immediately put it to use. And I immediately fell in love. This thing is awesome!!! Vacuuming may be my new favorite chore! I can totally see Husband and I arguing over who gets to vacuum. We're two happy campers!
P.S. Bed Bath & Beyond and Dyson both have no idea that I exist or blogged about either of them, but if they do discover this and would like to give me free things I wouldn't be opposed.
I spent a few moments chatting with one of the sales associates about the features of the different vacuums they had. With her recommendations we went with the same vacuum that we had initially wanted. And I'm glad she didn't try to up-sell us. This is what we came home with:
 |
| Please ignore my blindingly white legs ;-) |
We got it home, snapped it together and immediately put it to use. And I immediately fell in love. This thing is awesome!!! Vacuuming may be my new favorite chore! I can totally see Husband and I arguing over who gets to vacuum. We're two happy campers!
P.S. Bed Bath & Beyond and Dyson both have no idea that I exist or blogged about either of them, but if they do discover this and would like to give me free things I wouldn't be opposed.
Thursday, August 18, 2011
All About Penguins
Husband's latest work project has revolved around this book:
We spent one weekend building this:
For his final presentation he made his first tablescape. I was so proud! And it's pretty cute that he wanted me to share it on the ol' blog.
We spent one weekend building this:
For his final presentation he made his first tablescape. I was so proud! And it's pretty cute that he wanted me to share it on the ol' blog.
Subscribe to:
Posts (Atom)


